Thanks to Autocratik for this series of RPG discussion prompts. And to my friend Tyler for his inspiring responses on his blog, Held Action. And for prodding me into reviving my own blog.
I’m going off-script today with my own topic: build your own game table. It isn’t often that I get to talk about gaming and woodworking in the same breath. I made this table because I needed a big surface that was lower than a normal table, but a higher than a coffee table. I also needed something inexpensive. Here’s my solution.
This table can easily be knocked down and stored when not in use. It’s built from one 4×8 foot sheet of plywood and a couple 2x4s. I built this to be comfortable for folks sitting on a couch or easy chair. You can adjust the dimensions to suit your needs.

Legs and table top cut from single sheet of plywood.
I picked a sheet of plywood with a good side and a patched side. I had the home center make the cut to separate the legs from the table top, and then had them cut the top to width. The rest of the cuts I made with a jigsaw.

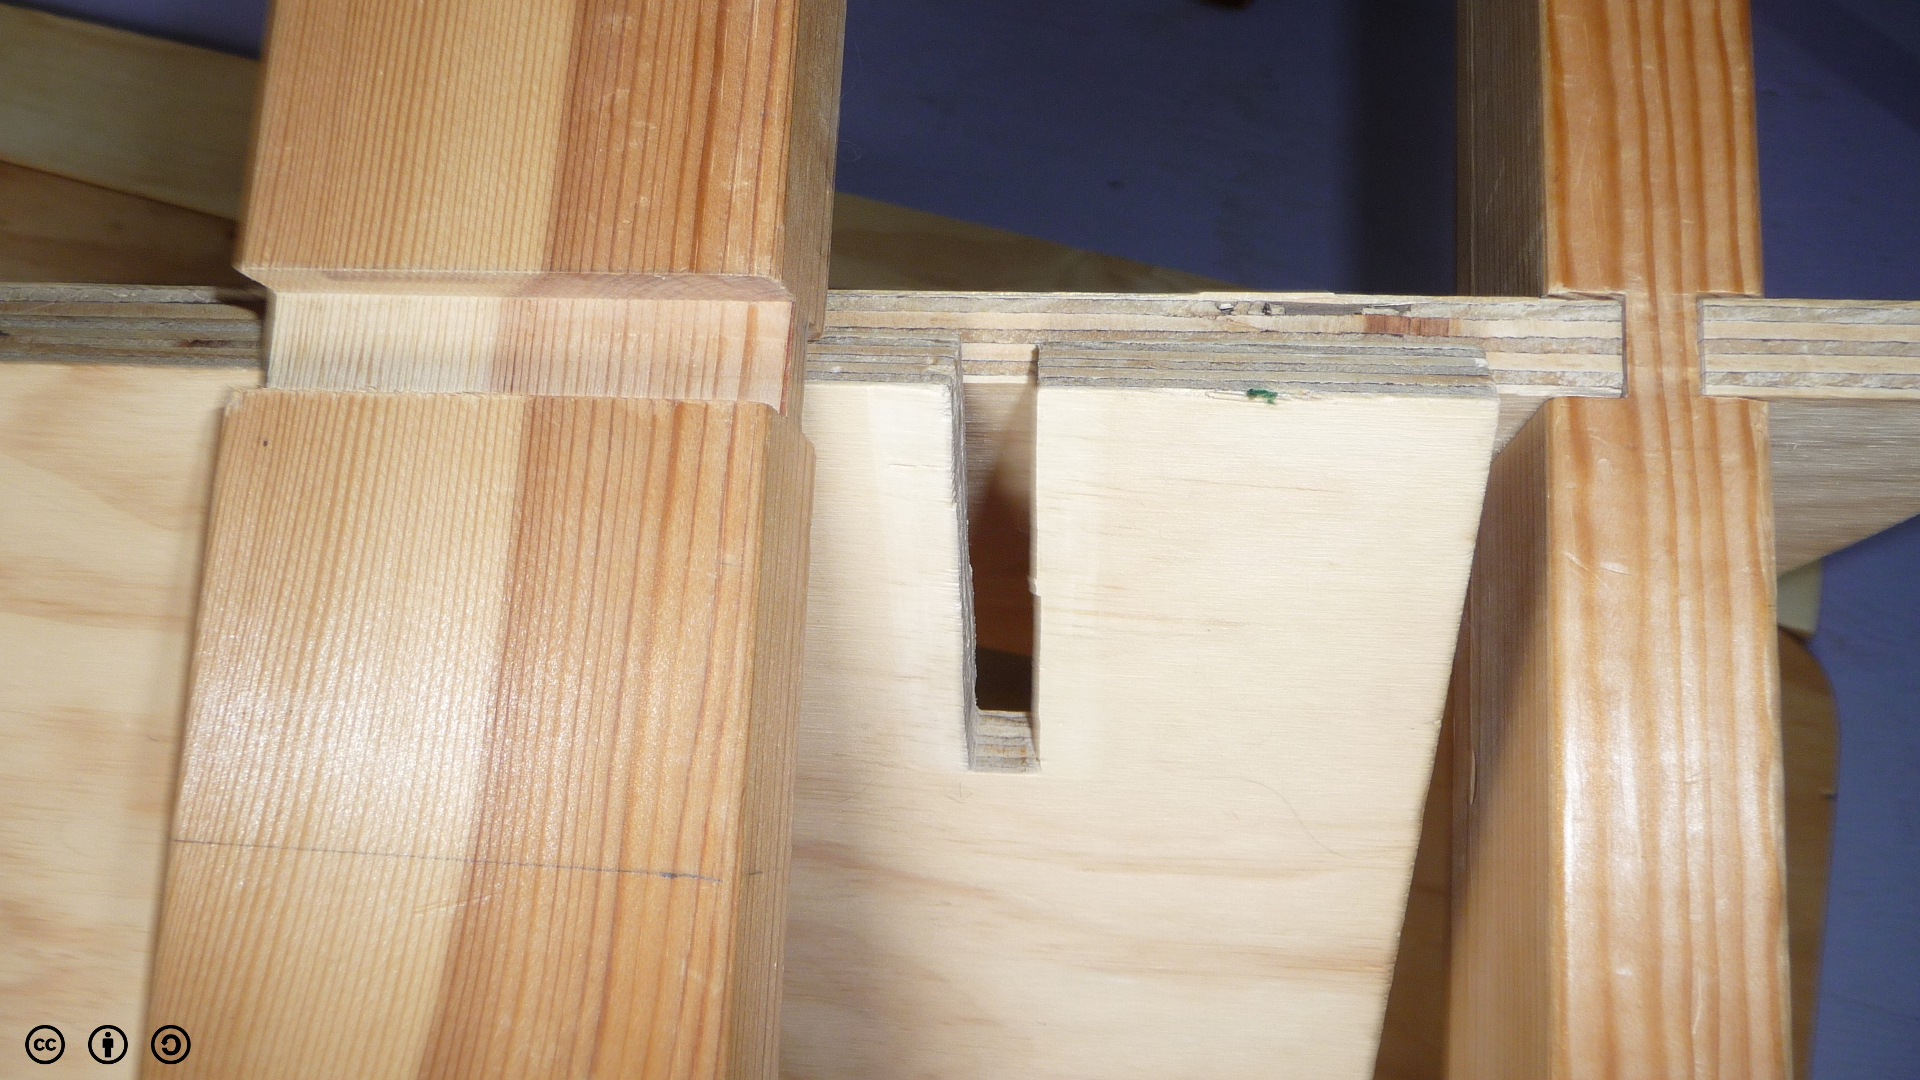
Two-by-fours fit into vertical notch in legs.
I used a simple edge-lap joint; grooves on each side of the 2×4 that lock into a vertical notch in the plywood leg piece.

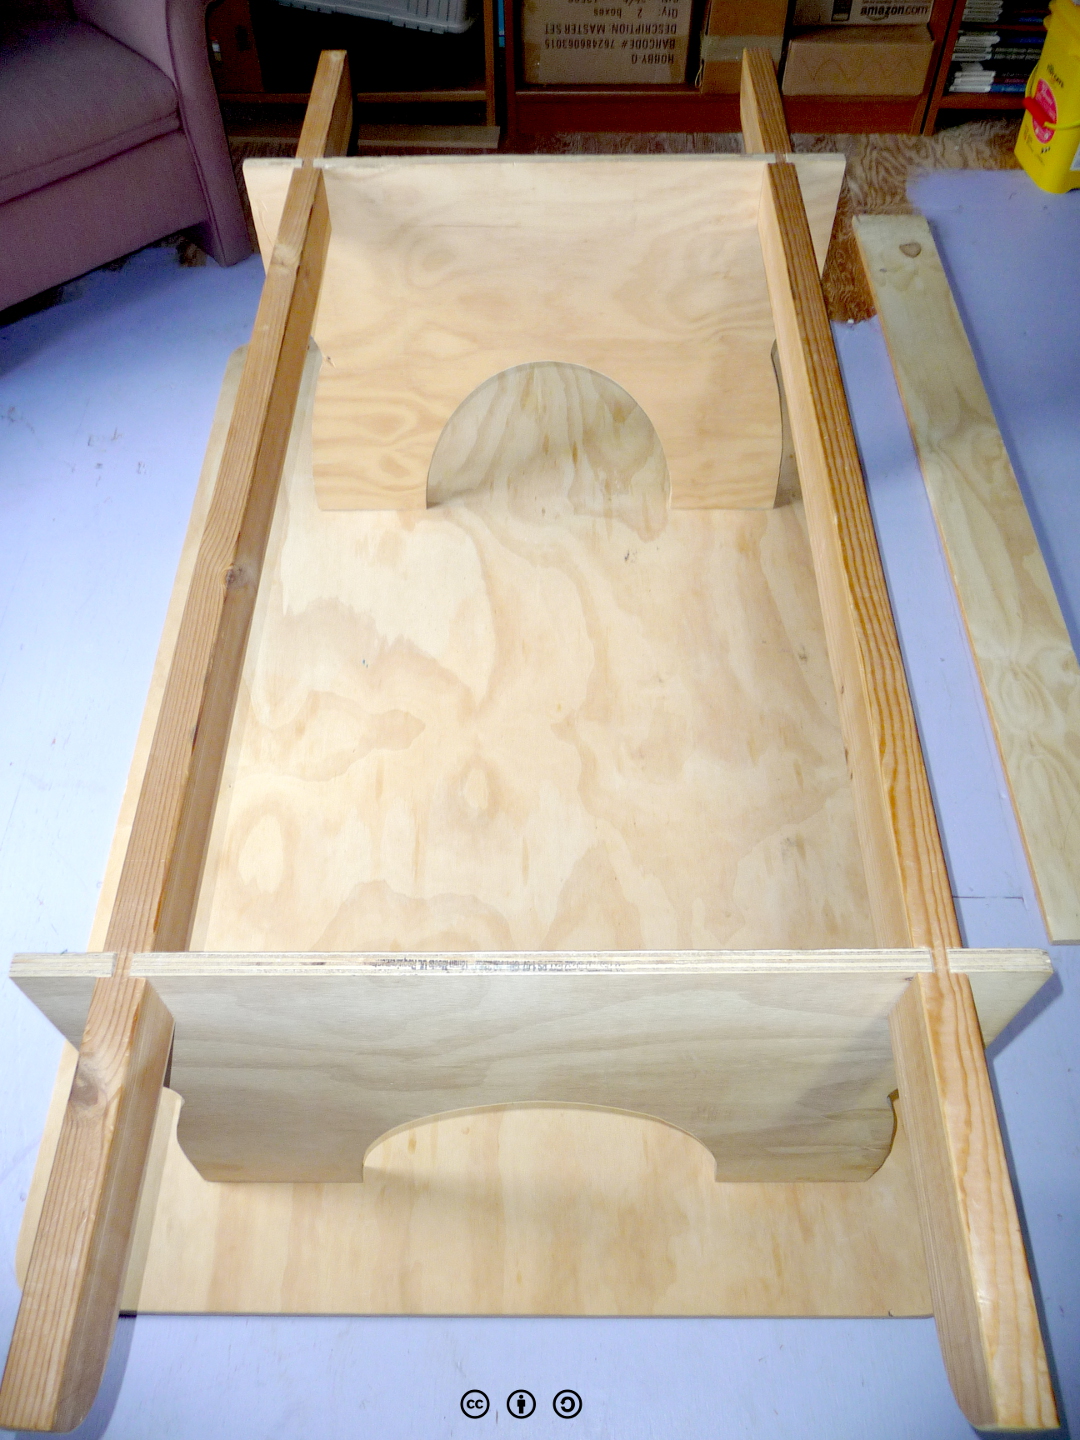
The legs and braces assembled.
Here are the legs and braces assembled. It’s surprisingly sturdy.

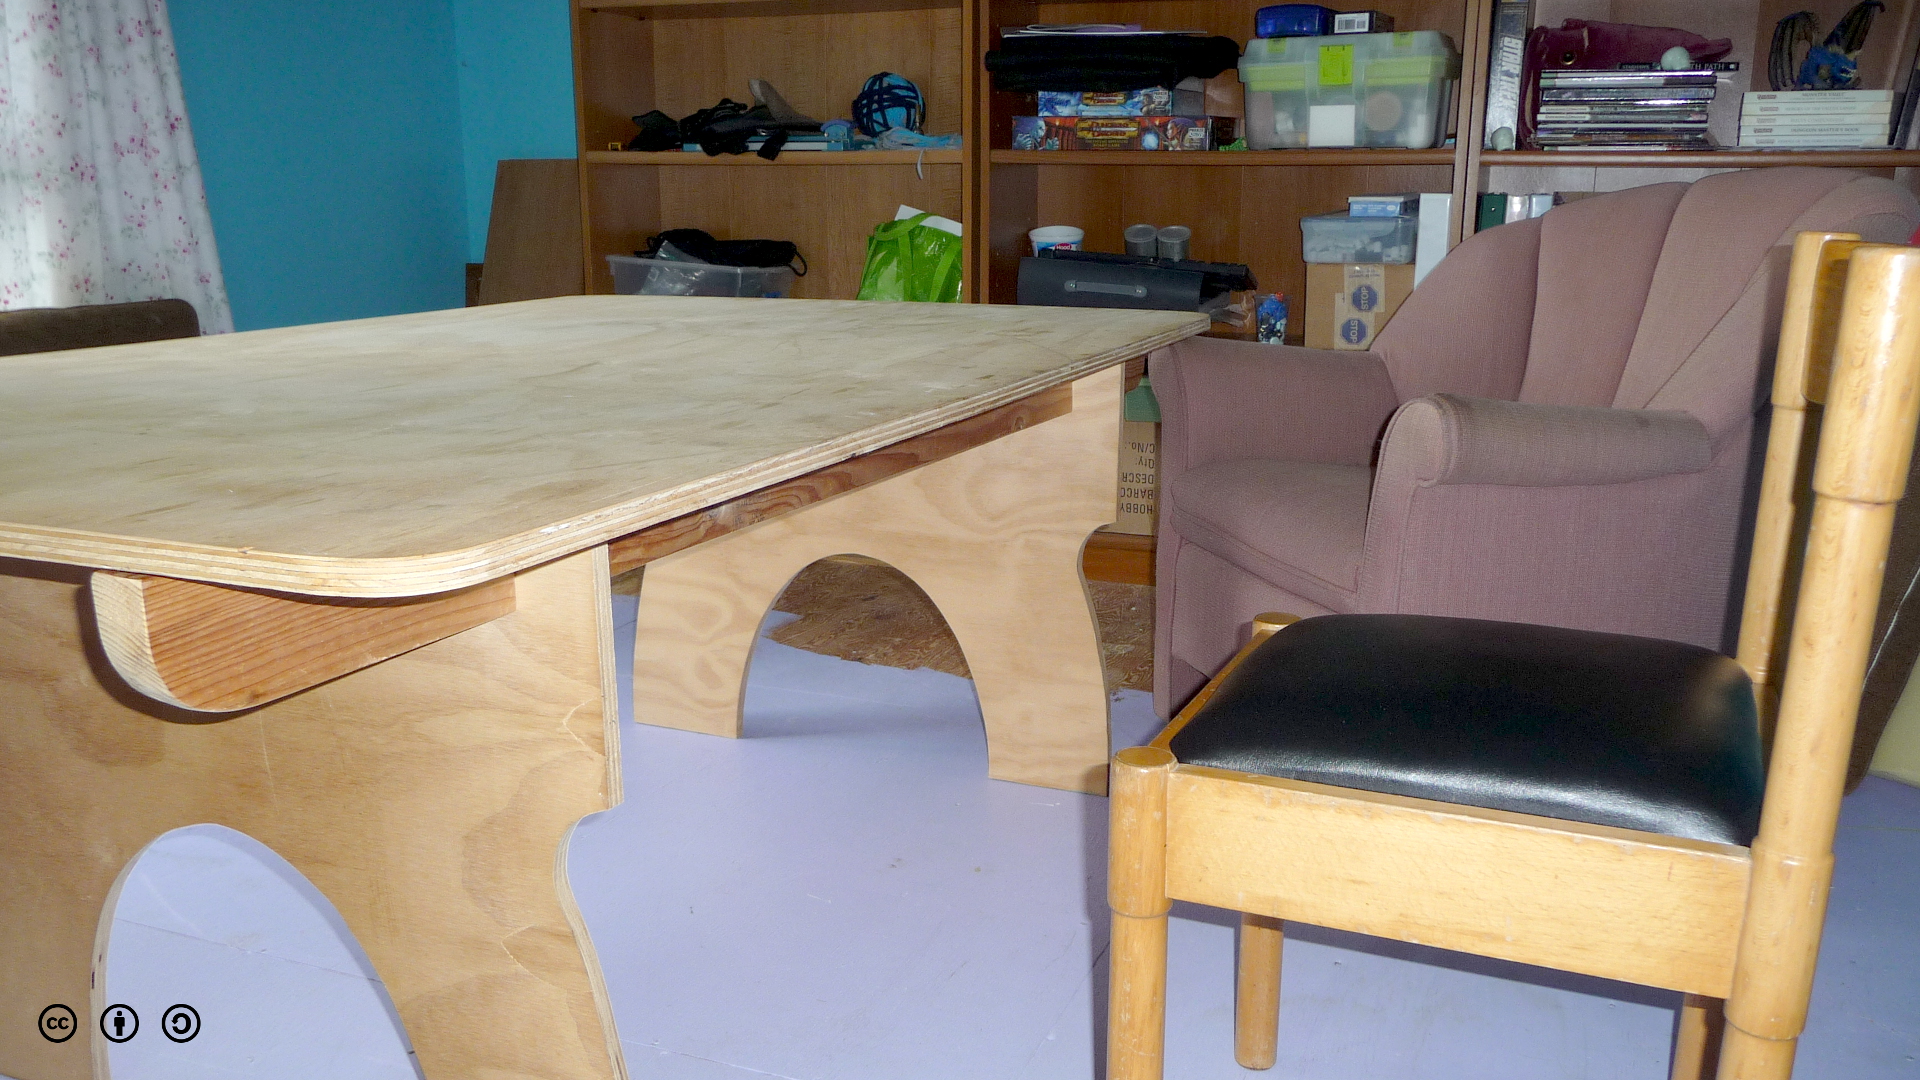
Table height was select to work well from low chairs or couch.
This photo shows the height of my table, which is 24″ (half the width of the plywood). It’s low enough that people in easy chairs or on a sofa can see the table easily.

Some useful accessories: elastic tie downs, acrylic sheet or gaming mat.
I used some elastic tie downs to keep the table top from sliding around too much. More recently, I picked up a sheet of acrylic, under which I can place maps or grid paper. I have a preference for wet-erase markers, and they work nicely on the acrylic.
I also picked up a couple large pieces of craft felt to cover the table, which was a nice surface until the cats got to it. I didn’t put any finish on the table, but I’m considering adding some paint (to cover the food stains).


