I built a picnic table during my vacation in August. I hadn’t built anything this involved in quite a while, probably not since the chicken coop over ten years ago. It seemed like this ought to be a pretty straight-forward project, and I spent time looking at plans online until I found a set that I liked.
Then it was off to the local hardware store for lumber and fasteners. I decided to make the legs out of pressure-treated lumber, but the rest is regular 2x framing material.
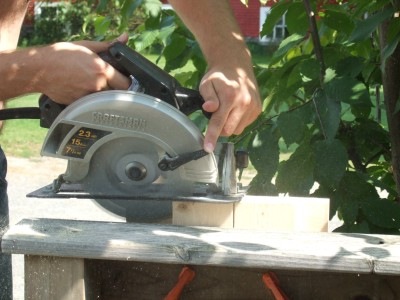
First step was to cut the lumber to dimension. I did find a couple errors on the plans as I went, though:
- Part B, cross stretcher that supports the seats, needs to be 60" long (as indicated in the elevation), not 84".
- Part D, seat members, need to be 84" (same as table top), not 11-1/4".
Luckily, I was very careful to measure twice, and double-check the diagrams, before cutting.

Before assembling the top, I needed to cut some spacers. A few stacked tires don’t provide a very stable surface for careful cutting.

Once I got the table top assembled, I needed to put the legs and cross stretchers together. I spent several hours working that out. I made once mistake, which required repositioning one of the carriage bolts. But in the end the angles were consistent.

I then needed to cut the center braces to fit. Let’s just say that I did get the legs perpendicular tot he table surface. 🙂 I’m lucky enough to have two drills, so I used one for pilot holes and the other as a power driver.

I’m not really cutting the handrail on my deck. I needed a stable vertical surface to clamp the short middle stretchers for the seats, which had a bevel cut in them. Once clamped, I used the circular saw with the blade angled.
This is a maneuver I won’t try again. The saw was precariously balanced, and the waste jammed the blade. I ended up finishing with my hand saw.
Another issue I had with the plans was that I was supposed to attach the seat members to this short middle stretcher, each with a single screw. That sounded pretty awkward to me, so I screwed the seat onto the table first.

Then I flipped the table up and attached the stretchers from the bottom. (This was easier than lying on my back trying to do it with the table on the ground.)

I completed the table just before my vacation was over. Then my Beloved Wife took over for the finishing. She used a small orbital sander to smooth everything.

And then she stained the surfaces purple with RIT dye. Once that dried, she sanded again, and applied some outdoor poly. I think the photo comes pretty close to the color (at least on my screen), but the final product is even nicer in person.

I’m quite pleased with the way the table turned out. It’s very solid and has plenty of room. Now that I’ve built one, I can’t pass by a picnic table without taking a quick look at its construction for comparison. 🙂
At this point, we still haven’t eaten a meal at the table! Our work and student schedules grabbed us soon after this was completed. But hopefully there will be a few more warm days before Fall asserts its hold on the hills of Vermont.
One lesson that I took away from this project is that I need to make myself a workbench of some kind so that I’m not working on the deck, old tires, milk crates and plastic stools. Hmmm. That sounds like another project, doesn’t it. 🙂
Thanks, BW, for giving me the idea for the project, for your photo documentation, and your loving finish work. She posted a much more timely blog entry about this project, featuring more pictures of me with no shirt. You’ve been warned.
And thanks, NatureBoy, for your encouraging hugs and comment, "I like it when you do woodworking."

Pingback: Chicken Coop Plans Resources | Chicken Coop Plans Blog